Hello crafters! Today I am sharing a card that I am going to enter into the Seven Hills Craft Challenge. This is my first entry into any challenge so quite a milestone for me!
Here is my finished card.

I started with my texture paste background as the paste takes a little while to dry (an hour approximately). I squished my Tumbled Glass Distress Ink onto my craft mat, and then spooned some texture paste onto it, adding colour until I got the shade I wanted. I then pasted the background onto the card base using my new My Favorite Things Wonky Chevron Stencil. I love it when you peel the stencil off and see the result!

Make sure you clean your stencil, applicator and craft mat quickly as the dried paste can be hard to remove (I know this as I got some on my top. And it is still there!).
Whilst the card base was drying I found a die cut dog and tennis ball from the Avery Elle Furry Friends set that I had previously coloured, saving myself oodles of time! All I needed to do was stamp up the dog bed and and colour it in. I used Derwent Coloursoft pencils for this. I really love how you can see the texture on the final images. This is particularly good for the pooch!
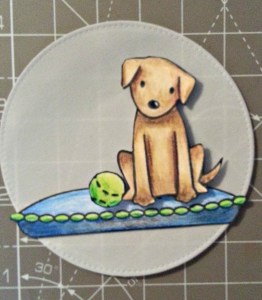
I found a vellum circle which I had die cut with my MFT Pierced Circles stax die, and adhered the dog bed using double sided tape. I then adhered the dog and ball using foam tape to give it a bit of dimension.
All I needed to do was stamp the greeting using Versafine Onyx Black. This works well on vellum but be careful to let it dry thoroughly as it can easily smudge. I decided at this point to die cut a few stars and colour them in just to add a final little embellishment.

The final piece of the jigsaw was to adhere the completed vellum circle onto the dried card base. Voila!
I hope you like the card, thank you for visiting.
Supplies used: My Favorite Things Wonky Chevron Stencil; My Favorite Things Die-namics Pierced Circle Stax; Avery Elle Furry Friends; Tumbled Glass Distress Ink; Derwent Coloursoft Pencils
This is just fabulous- I love the embossing background- just so soft and pretty! Thanks for joining in with the Seven Hills Crafts challenge xx
Thank you for your kind comments, it was a fun challenge and I look forward to the next one!
Such a cute card! Thank you so much for joining us at Seven Hills Crafts Sketch Challenge.
Gorgeous, and the puppy is soooo sweet! Love your coloured paste, looks awesome, especially with the vellum! Thanks so much for playing along with Seven Hills Crafts x
It’s fab! I love, love, love that background – I’m always amazed at the texture you get from that paste and how good it looks when you colour it. Lovely colouring on the doggie. Yay for your first challenge entry 🙂 xx
Thanks Ruth! You know how I love stencils and paste… you can do so much with stencils but I really love pasting with them. And inking through them…. Thanks for visiting xx
hey Lisa! i finally found you. now i’ll get a notice when you post something on your blog. i hope i’m not driven to make a blog also. lol i’m not computer savvy at all. i learned everything the hard way: trial and error. i love your card and your tutorial was really well done. i can picture you doing you tube videos soon. i’m so glad i found your blog, its really nice. have fun! hugs, treen
hey Treen! Glad you found me, thank you for visiting :). I cannot see me doing videos, ever, but, who knows!